
Kids are ingenious, especially when you're trying to restrict their access to something they like a lot.
I learned this over the span of a few months as I tried to rein in my son's electronics usage. We enforce screen-time rules at our house, but when he changed schools and had to start taking public transit back and forth, his mom and I felt that a phone was important for his safety and so we could keep in touch about our plans.
Too much of a good thing
My son's first device was an Android Motorola Moto-E. This was OK at first, but then we noticed whenever we watched him walk to the streetcar stop that his eyes were always down on his device and he wasn't really paying attention to his surroundings. We also started hearing from the school that all of his recess and free time was being spent playing with the phone (alone).
Of course, we tried coaching him on this, but he couldn't seem to resist when there was no one there to remind him. We were also having challenges with him sneaking in extra screen time beyond his earned daily allocation and we were running out of practical incentives and threats.
Asserting parental control
I attempted, with limited success, to put app restrictions on the phone. For instance, I didn't want him using YouTube, surfing the web or downloading games. A few weeks ago, he figured out how to crash the third party parental control app, rendering it ineffective. The device had the current "Marshmallow" version of Android, which apparently, as of this writing, has few working app restriction options available to replace it with.
In addition, the Moto-E's screen had gotten badly cracked from an accidental schoolyard pavement impact so we decided to just replace the Android smartphone with a dumb phone.
Trying a dumb phone
At first, my son was devastated that we had gotten him a circa-2000 feature phone, but then he found the built-in games and began racking up the high scores. Maddeningly, the dumb phone was so dumb that there was no way, google as I might, to hide, delete or otherwise disable the games.
My son kind of mocked me about my inability to take the games off, which, I have to admit, didn't result in a kind reaction on my part. I confiscated the device and let him cope with no phone for a little while.
I still wasn't comfortable with safety implications of him not having a way to reach us, so I got hyper-focused on researching a better solution.
Google has inexplicably restricted their Android-level Restricted Profiles to tablets only, meaning that for a phone, iOS has by far the best built-in parental controls. Granted, there are more third party apps available to manage child access on Android, but in my earlier experience, they were all pretty clunky on Marshmallow and almost trivial to defeat.
Back to smartphones: iOS
I decided to return the dumb phone and replace it with a cheap, refurbished, unlocked iPhone 5C so I could leverage iOS's capabilities.
I had found, in addition to Guided Access and Restrictions, that Apple provides an even heavier-duty access control solution you can access using the free Apple Configurator if you have a Mac on which to install it.
Apple Configurator
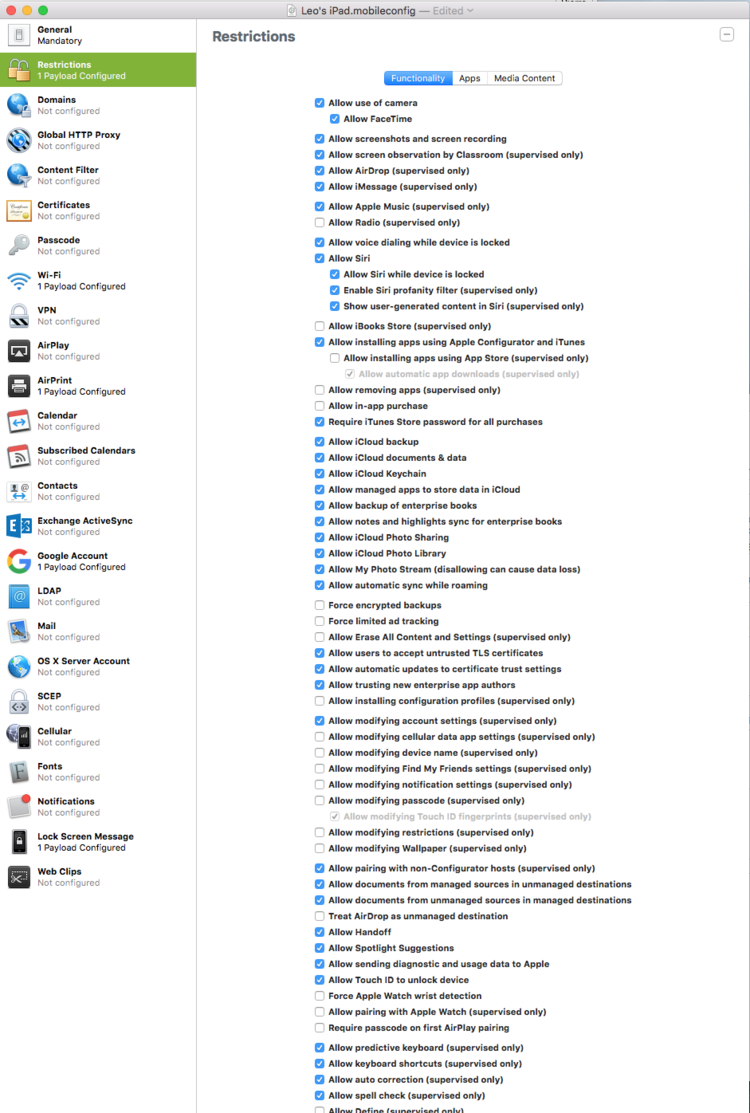
Apple Configurator is intended for schools and businesses that have a lot of devices to configure, and employees or students they need to keep out of trouble. The level of control it provides is almost overwhelming. You can:
- Disable the App Store, app installs, app uninstalls, purchases
- Disable web browsing
- Disable Siri, camera, Airdrop and other features
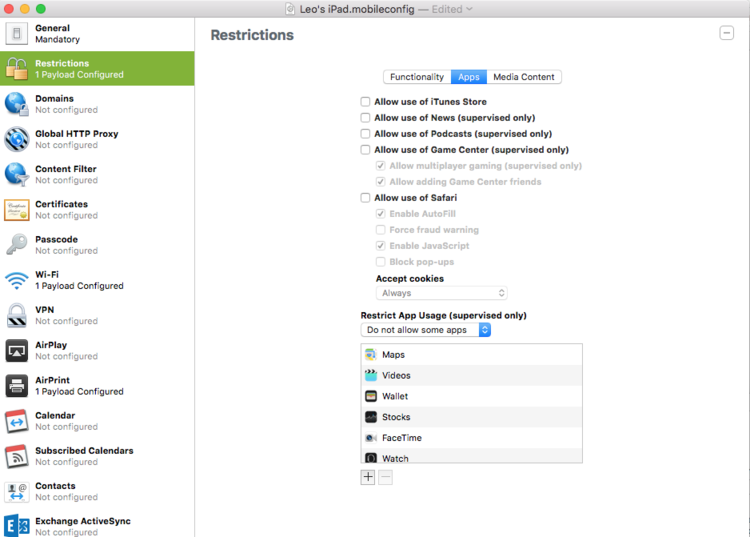
- Disable specific apps, even if they're not currently installed on the device.
- You can even Apple's own unremovable system apps (like "Stocks", "Compass" and "Videos")
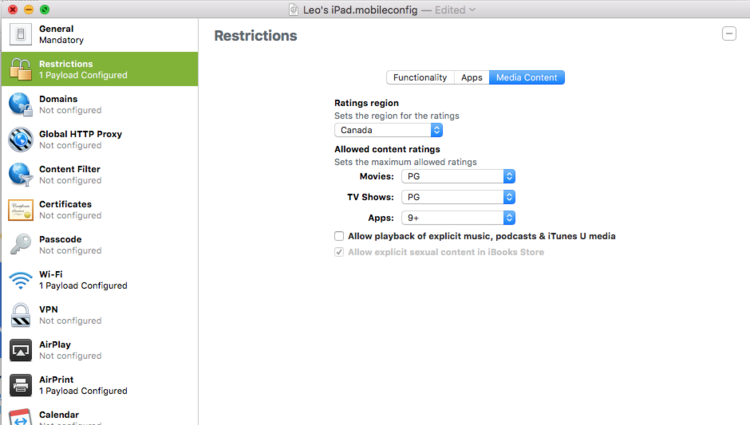
- Implement content filtering
- Configure all settings from the Mac and lock them out on the device itself.
Outstanding!
Okay, as a tech-savvy reader, you might be thinking, "Pierre, there are a lot of third party parental control apps that restrict most of these same things and they're really easy to use."
True. Most dedicated parental control solutions have the advantage of being more user friendly to set up and offer smart features like remote control for parents and timed access. But if you child has the device's lock code (which is generally advisable if the screen locks itself for security) then the configuration profile that those apps install can easily be removed once they find it in the phone's settings.
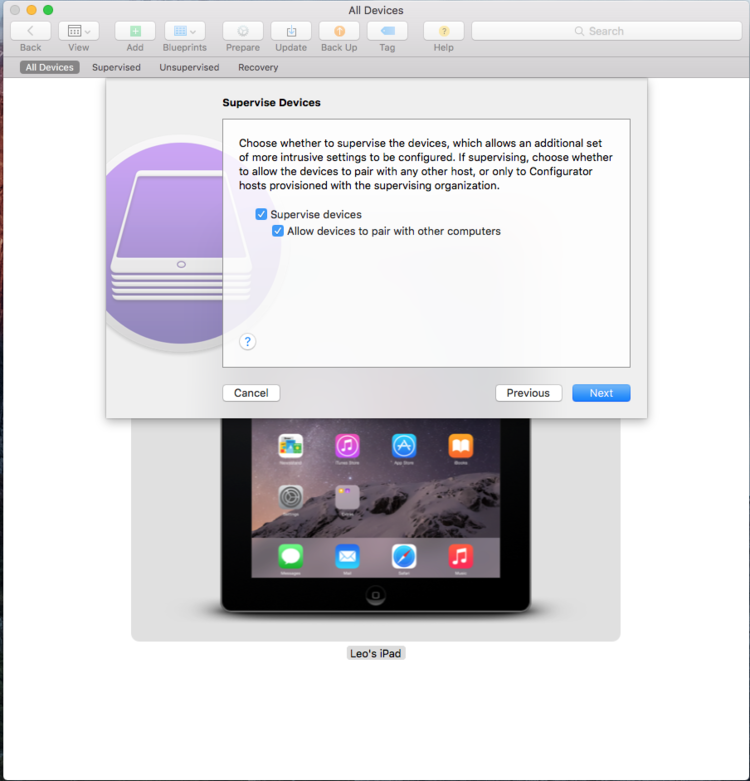
Apple Configurator works in a similar manner to the third party apps, installing a configuration profile on the device through a USB connection. However, it goes a step further by implementing Supervision, which locks the configuration profile so that it can only be removed through Apple Configurator itself, with dedicated password or time-unlock protection.
To be fair, some of the third party apps provide instructions for installing their configuration profile via Apple Configurator, which should let you implement supervision for the best of both worlds. I haven't tried that yet, so I'm going to start by sharing how to implement supervision and access restrictions with only Apple Configurator and you can decide for yourself if you need to do more.
Disclaimer: The following steps are relatively easy and worked for me. Apple Configurator isn't rocket science, but it's pretty powerful tool that could result in you inadvertently locking everyone out of the device if you make it super-restrictive and forget a password, which could cause you more grief than it's worth. You are responsible for what you do with it! Please refer to Apple's official documentation if you're unsure about anything.
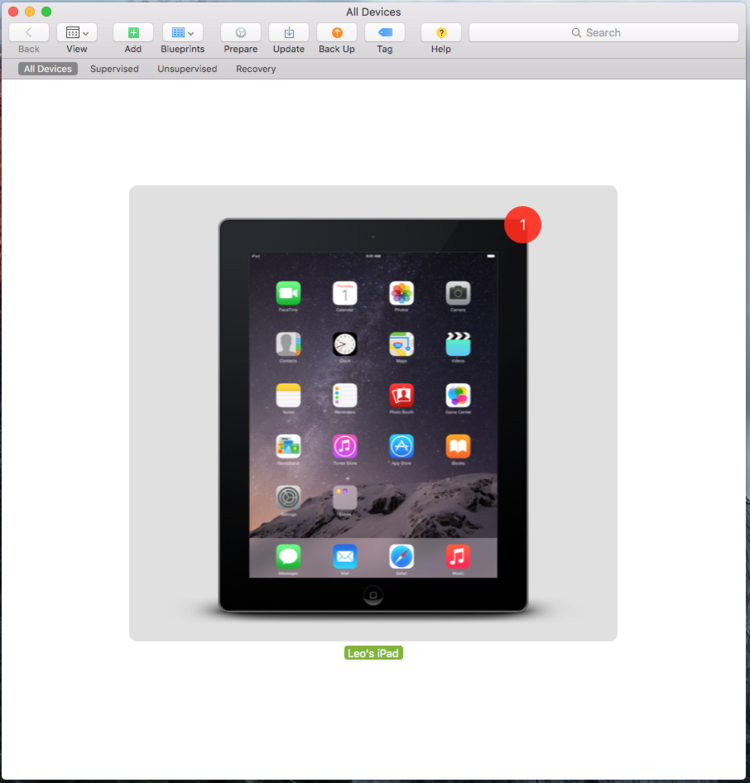
Step 1: Connect your child's device to your mac
Use a compatible sync/charging USB cable to physically connect your child's device to your Mac. You'll need to ensure the device is powered on and unlocked. You'll also need to tell the device it's OK to trust your computer if a dialog box to that effect appears.
Step 2: Back up the device
If there's anything important on the phone that you want to save for later, back it up now because implementing supervision in Apple Configurator will require that you wipe the device clean and do a fresh iOS install. You can back up using iCloud, iTunes, or even Apple Configurator itself.
Step 3: Disable activation lock
If you had the Find iPhone Activation Lock feature turned on, you can turn it off from the iCloud settings in your device's Settings app, or, also in Settings, you can just go to General > Reset > Erase All Content and Settings, which wipes the phone clean. The phone gets wiped anyway in the next steps, so it's pretty much six of one, half-a-dozen of the other.
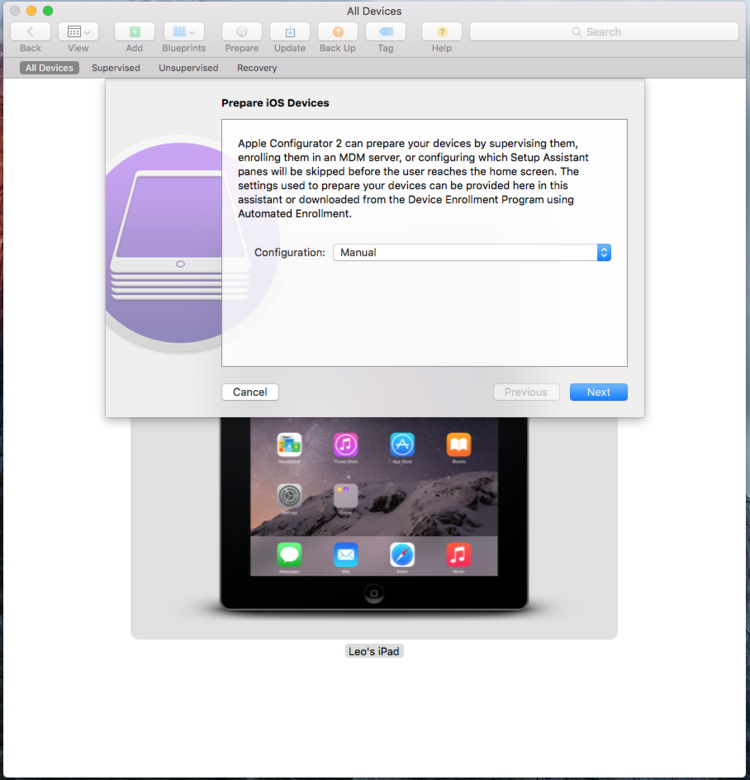
Step 4: Prepare the device
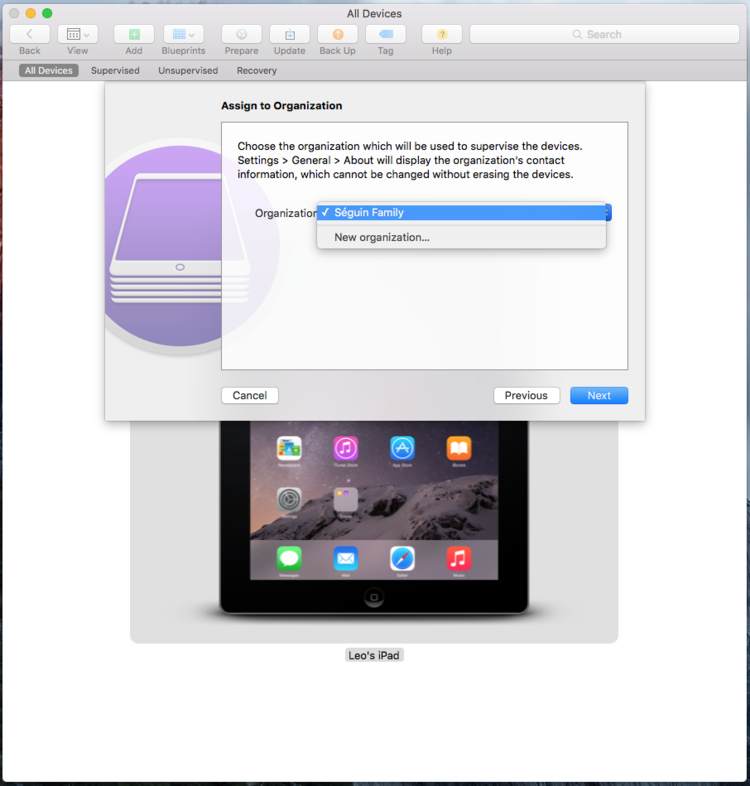
You'll need to "prepare" the device so that it can be supervised. This process specially configures a fresh build of iOS that's going to be installed on the phone. Click the Prepare button and Apple Configurator walks you through a wizard.
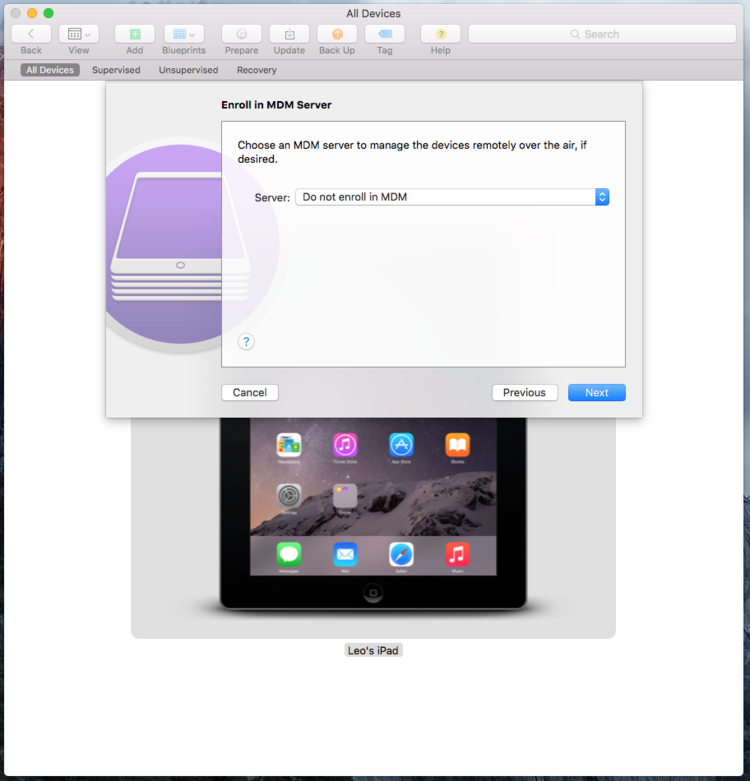
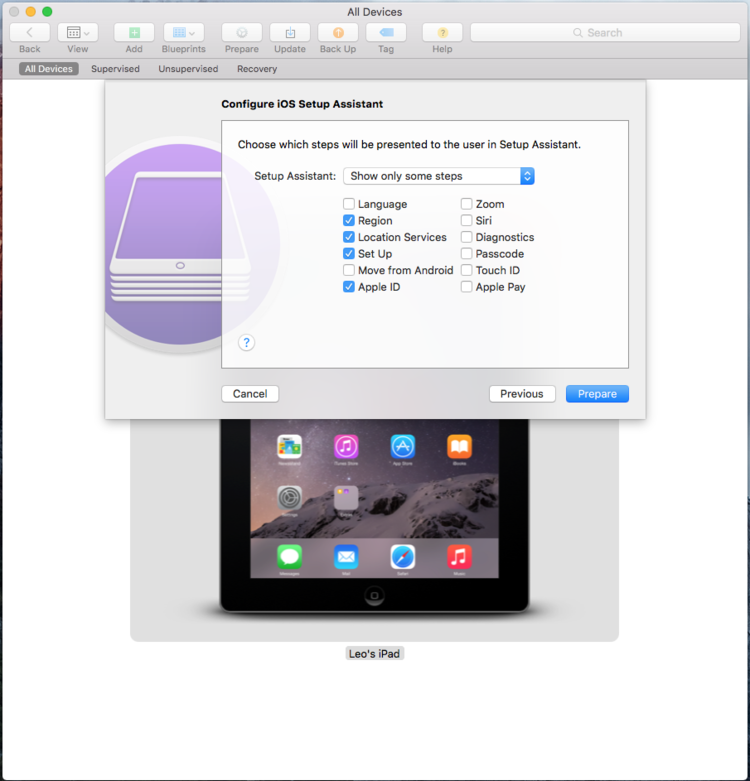
When you're done, click the Prepare button, accept any warnings about wiping the device and take a break. It will take a few minutes to download the latest iOS, configure it with your settings and install it on the device.
IMPORTANT: if you choose to prepare and configure the device in a highly restrictive manner, don't do anything that will prevent *you* from removing the restrictions when needed. Take careful note of passwords, etc.
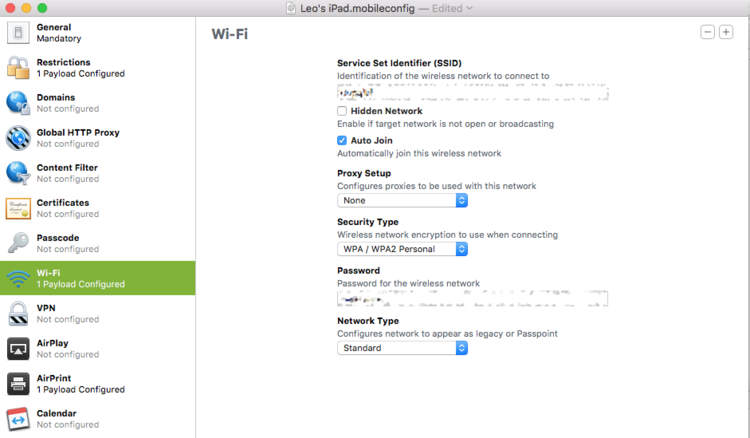
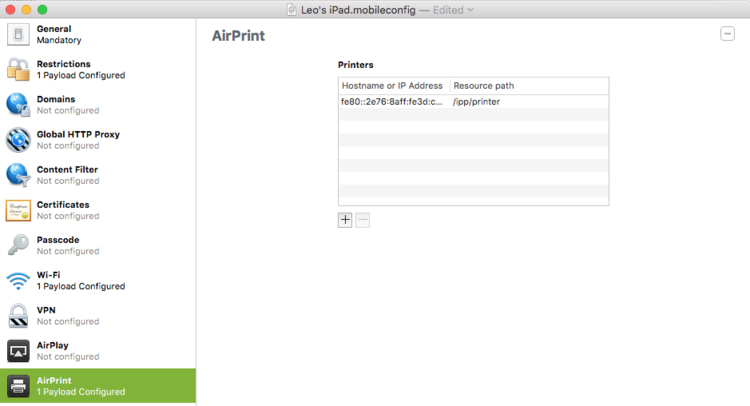
Step 5: Create a configuration profile
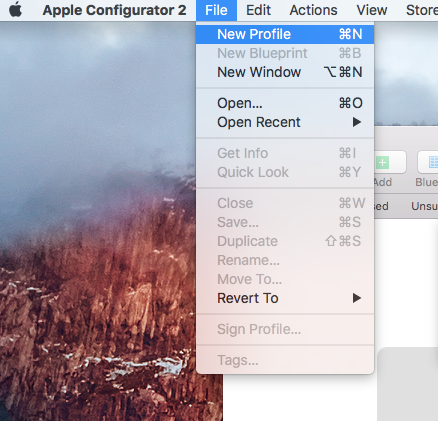
With your fresh install of iOS complete, leave your device plugged in and type ⌘N or select New Profile from the File menu. This will open a new profile window, ready for editing.
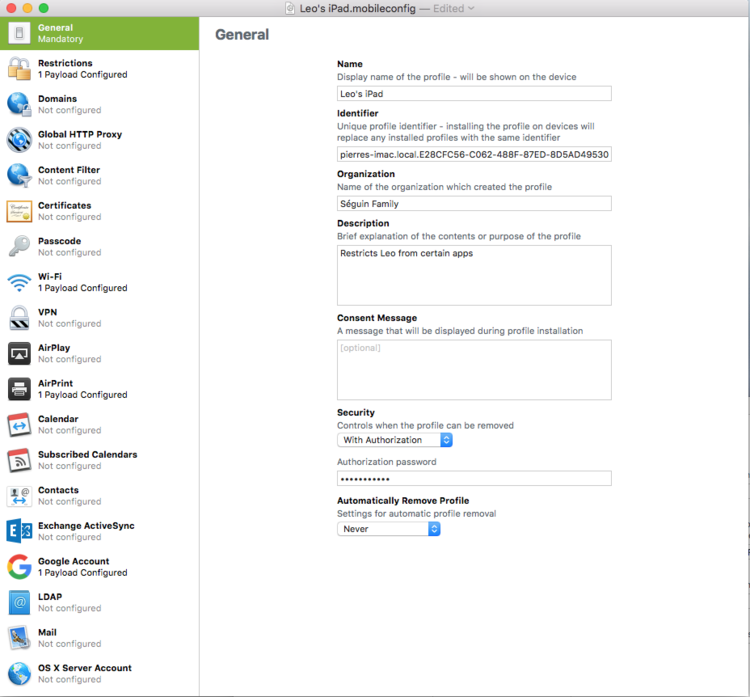
Note how the configuration profile doesn't distinguish between iTunes and Apple Configurator for app installs. If you're concerned your child will install undesirable free apps downloaded via iTunes on a Mac, you'll need to install the apps you do want via Apple Configurator before you install a profile with app installation disabled.
When you've finished setting up a configuration profile, Save it to a location you'll be able to find later.
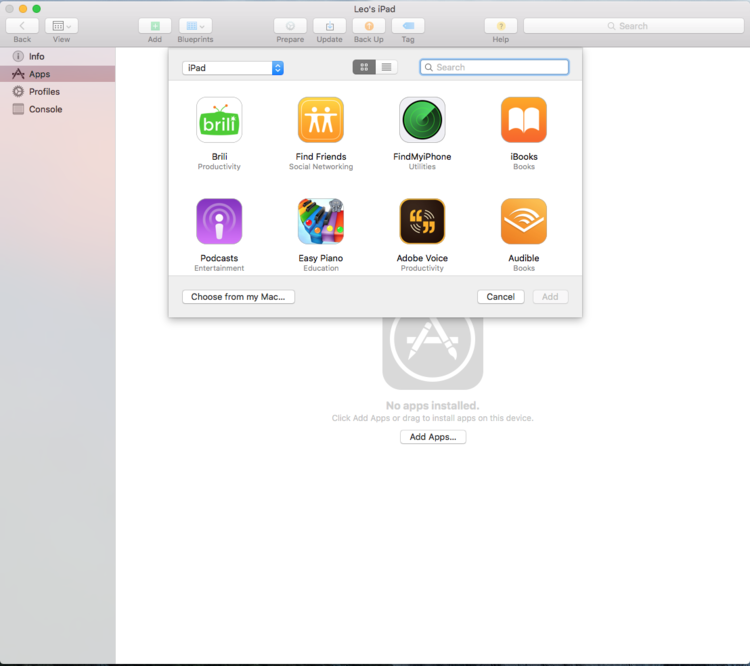
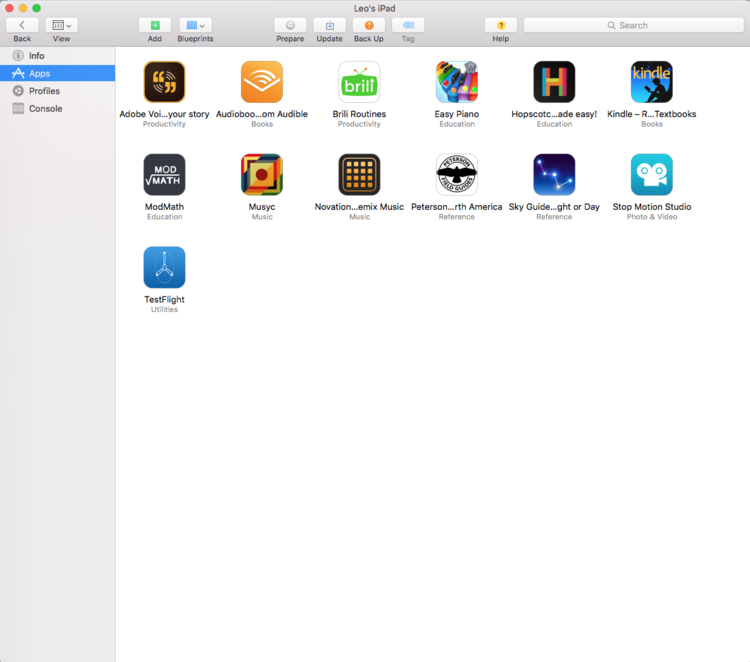
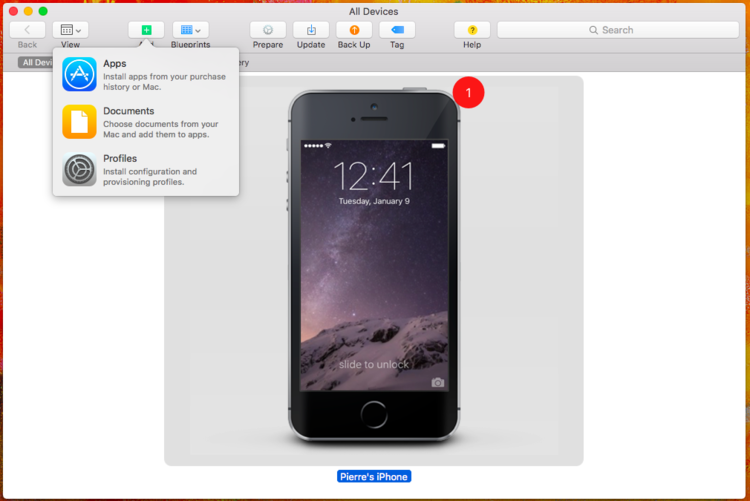
Step 6: Install apps
If you've disabled app installation via Apple Configurator, the next thing you'll want to do before installing the configuration profile is finding and installing any apps you want your child to have on the device. You can do this by returning to the main Apple Configurator window, opening the connected device and selecting Apps in the left navigation.
Click the Add Apps... button and you'll be able to sign into the app store with your child's account (or yours) and this will let you download and install any apps you've previously purchased.
Note: Don't use this to install any system apps if they're listed. This will cause an error and the installation process will fail. The system apps are just going to be there anyway, unless you've disabled them in Step 5b above.
Step 7: Add the profile
You can do this in a couple of different ways. You can drag the file you saved onto the connected device(s) in Apple Configurator, or you can click on the Add button and select Profile, then find the file with the dialog box.
Step 8: Test
With the configuration profile installed, play around with the device yourself to make sure it's behaving as expected before you hand it back to your child. You may need to experiment a bit.
If you need to make changes, updating the profile is as easy as:
- Open profile
- Edit profile
- Save profile
- Add updated profile to device
Step 9: Finish
That's it, you're done! You can hand the device back to your child, free of unnecessary distractions and confident that it will be really, really difficult (if not impossible) to defeat.
If you've got any comments or questions, please leave a comment below!
Make daily routines awesome with Brili